Elegant Half Updo Hair Tutorial : 6 Easy Steps – If you’re looking for a hairstyle that is elegant and fun, this half up do is perfect!
It’s a great way to show off your curls or waves without completely covering them up.
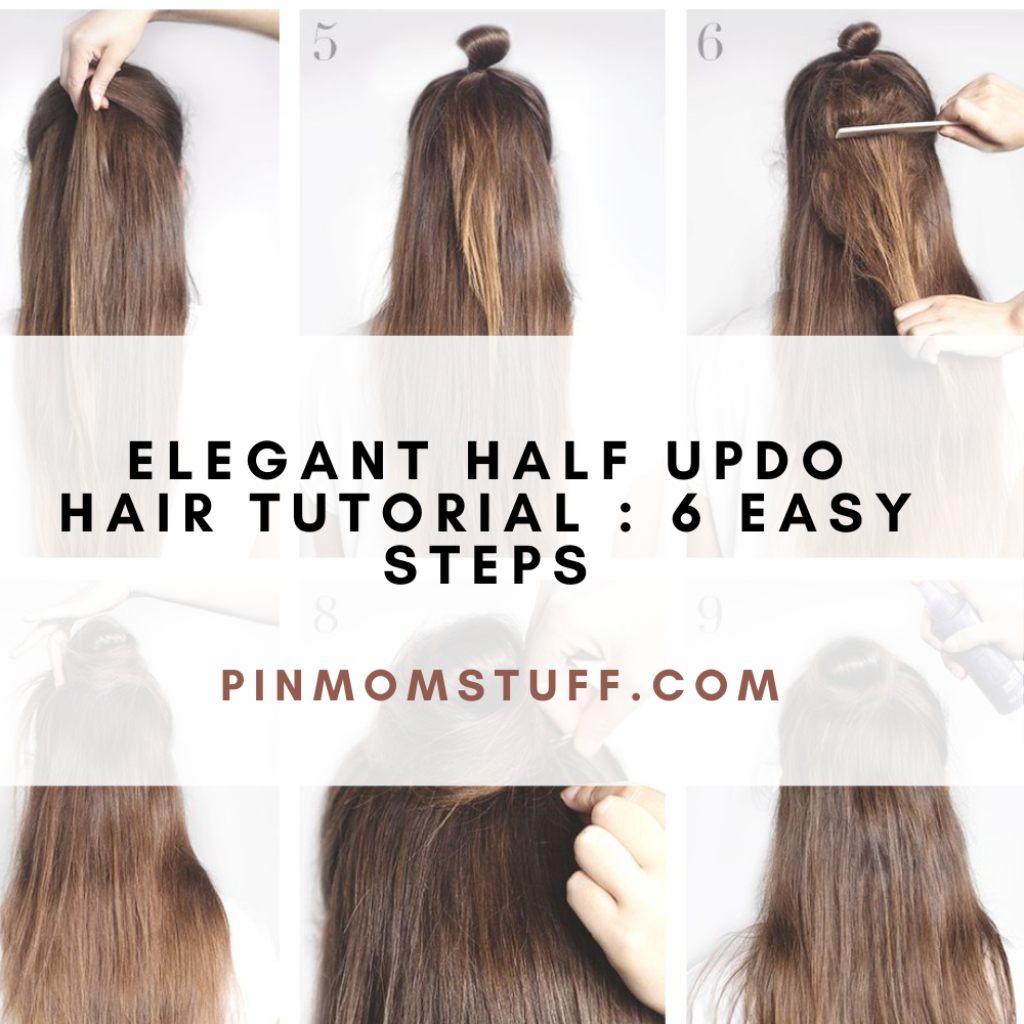
The best part about this updo hairstyle tutorial is that it’s incredibly easy to do yourself—I promise! Just follow the steps below, get some hairpins and bobby pins ready, and then let’s get started:
Create a deep side part.
To do this, use your fingers to create a part that is about halfway down your head.
As you can see in the photo below, this will give us plenty of hair to work with, but if you want more volume on top of your head, then try creating a deeper part!
Gather all the hair from that side of your head into one place.
If there are any stray pieces poking out from behind your ear or at the crown of your head (like mine), tuck them back into place by gently smoothing them into the rest of your hair with either your hand or a brush/comb
Twist the hair away from your face.
To twist the hair away from your face, take a small section at the side of your head and twist it away from you.
Make sure that you don’t pull the hair too tightly or too loosely—it should be about an inch thick and gently twisted.
Secure this twisting motion with a bobby pin in between each twist.
For example, if you had five twists on one side of your head, then use three bobby pins to secure them into place. This step is important because it keeps all of your twists even and neat looking!
Pull your twists back and secure them with bobbypins.
There’s nothing worse than having your hair fall down, or not being able to see when you’re out in public. The key to this look is using enough bobby pins—but not too many.
If you use too few pins, the style will be loose and messy; if you use too many, it will be hard to keep the twists up (and more likely for someone to notice that only half of your hair is up).
Use smaller bobby pins on finer hairs like those at the front of your head and larger ones on thicker pieces in the back. This way they’ll stay in place better!
Tease some of the hair to make it look voluminous.
Next, tease the hair at the roots. The teasing should be done at a 90 degree angle to your scalp. This will give your updo a little more volume and make it look thicker.
Tease all of the hair in this manner from side to side, and then pull it back into a ponytail holder or bobby pin it so that it stays in place for the next few steps of this tutorial.
Make sure you have some volume on the top of your head too.
- Use a round brush and volumizing mousse for extra lift in the top area of your hair.
- Wrap your hair around a rat tail comb, then let it hang down in front of your face for about 5 seconds before pinning into place with bobby pins along the sides of your head.
- If you have shorter layers or bangs, flip them outwards so they’re not sticking straight up from behind the rest of your hairline!
Style your curls to perfection.
Using a 1″-1.5″ curling iron, create sections of hair, and wrap each section around the barrel of the iron. Hold for 5-10 seconds depending on how tight your curls are.
Once you’ve curled all of your hair, use a leave-in conditioner to keep it healthy and shiny!
Make sure that you use a heat protectant spray before using any heated tools on your locks so that they don’t become damaged from all that heat exposure over time.
You can also use a brush or comb to style your curls after they’re done being curled so that they look more polished overall!
Conclusion
You don’t have to be a professional hairstylist to create this half updo hairstyle. Just follow these steps and make sure you have the right products on hand for your hair type.
Remember that it takes practice, so don’t get discouraged if it doesn’t turn out perfect on the first try. Happy styling!


